
Do you offer envelope addressing?
Envelope addressing is available for all of our holiday and greeting cards. Add return and/or recipient addresses to your envelopes for an extra $0.30 per card/envelope in your set.

How do I add addressed envelopes to my cards?
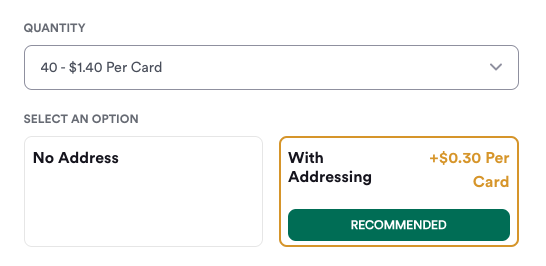
After you've chosen your card design, select the number of cards you'd like to print, then select the "With Addressing" option. Note: only white envelopes are available for this option.
How do I enter my return address?
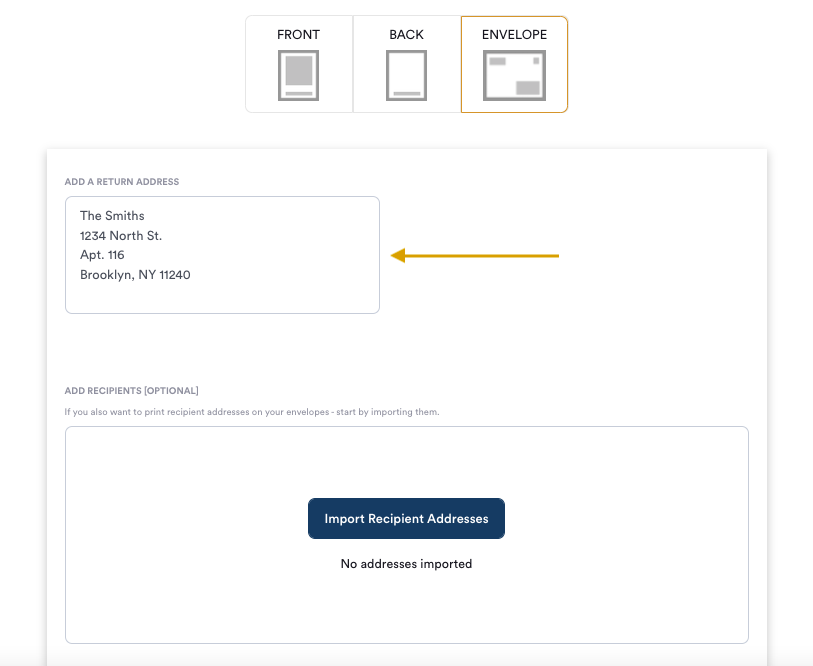
Within the Envelope section of the editor, type your return address in the box in the top-left corner, beneath "Add a Return Address". This address will be printed on each of your envelopes. You may type uppercase or lowercase but cannot change the text size, color, or font.
How do I enter my recipient addresses?
1. Within the Envelope section of the editor, select the "Import Recipient Addresses" button. You can upload an address file or paste table data from an existing spreadsheet.
Uploading an address file:
If uploading an existing file, make sure it is in CSV, XLSX, or XLS format. Or, download our address template (parabo-address-template.csv) and add your list. When finished, save and export your file as a .csv and upload it.
A few tips for filling in your recipients' addresses:
- Remember to leave the header row unchanged.
- Street 2, State/Province, and Country are optional fields that can be left blank if not necessary to the address.
- If any postal codes begin with zero, you will need to format the cells as “zip code” in Excel, “plain text” in Sheets, or "Numeral System" with 5 places and a base of 10 in Numbers. Otherwise, the zero will be dropped from the postal code.

Pasting table data:
Select and copy your table data, then paste it into the field. Select the delimiter that separates your data. In the example below, the delimiter is a space.

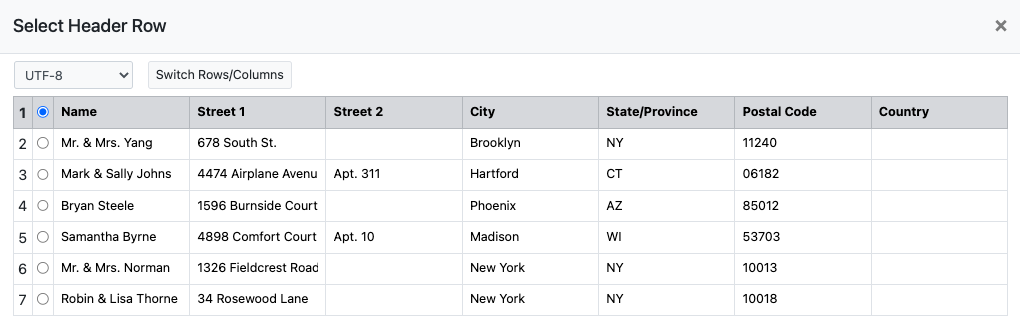
2. Select the header row (the row that indicates the name, street line 1, etc). You may use the "switch row/columns" button if needed. If you use our template, no changes need to be made for this step.
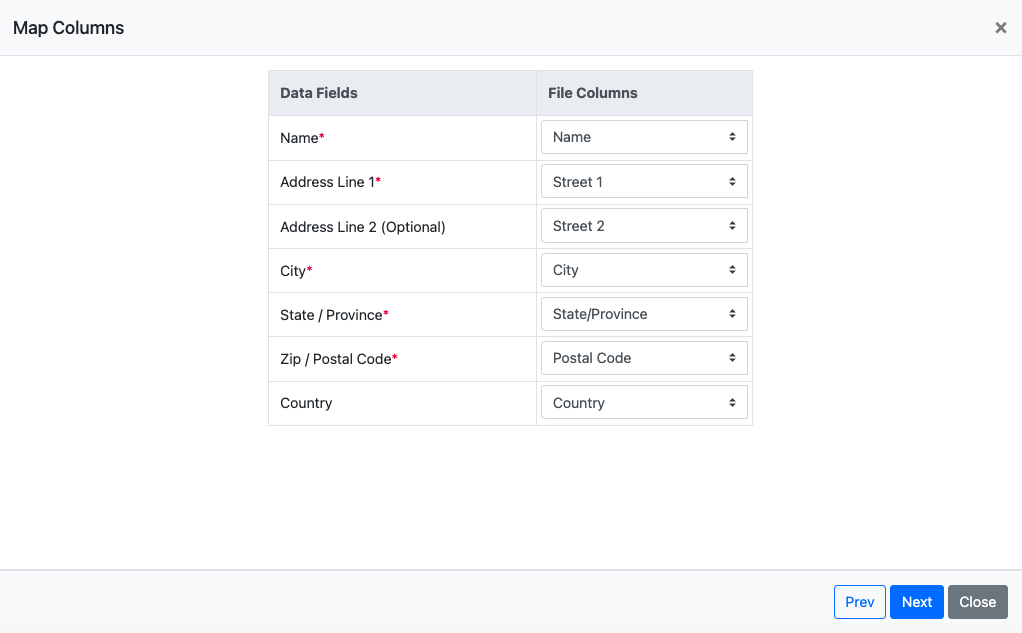
3. Make sure the data fields match your file columns. If you use our template, no changes need to be made for this step.
4. Finally, verify that your data is accurate. Our system will not flag if an address is incorrect, so please double-check each address before continuing. You may add, delete, and edit rows right from this page.
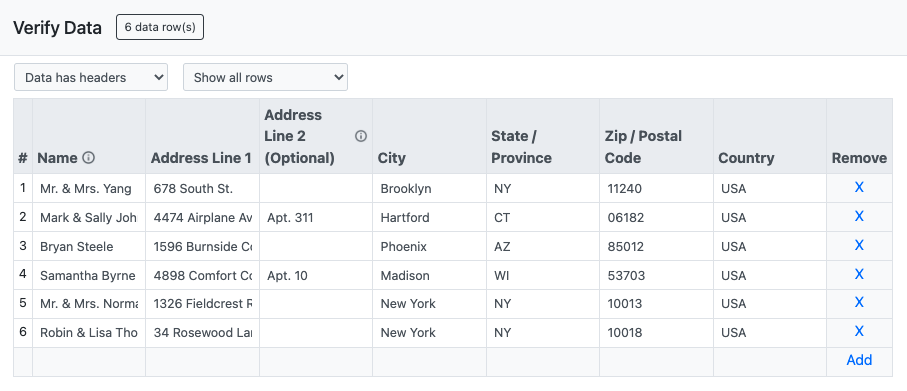
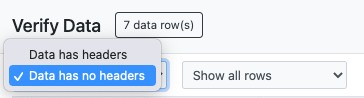
- If your address spreadsheet did not have column headers, be sure to select the "data has no headers" option.
- You will not be able to continue if you have data missing in a required cell. The cell will turn pink if it was left empty. Simply type within the cell to complete it, or delete the row by clicking the "x" beneath the Remove column.

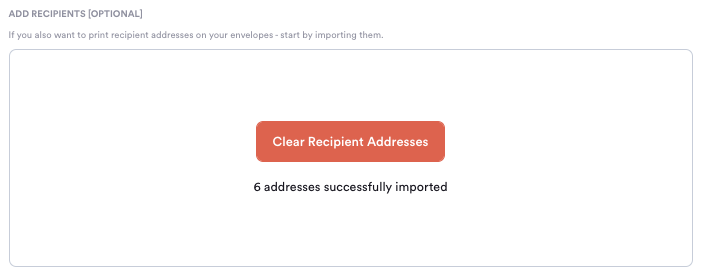
5. After processing your data, you should see that your addresses have been successfully imported.
What if I don't import enough recipient addresses?
If you included a return address, the remaining envelopes will have the return address only. If you did not include a return address, the remaining envelopes will be blank.
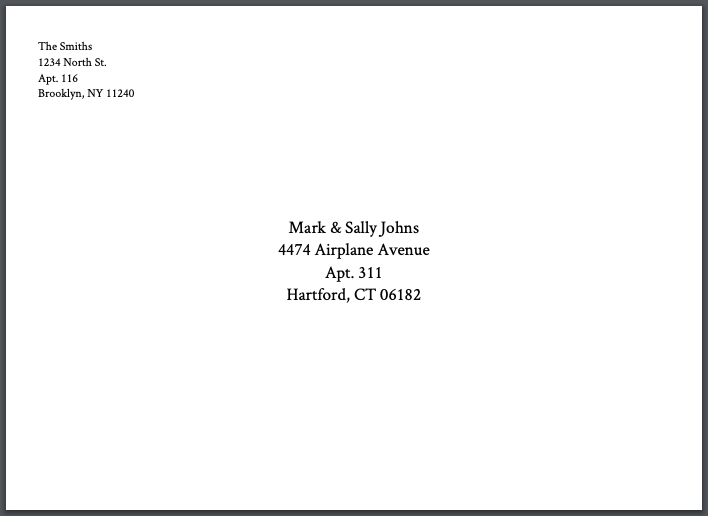
What will the printed envelopes look like?
Here is an example of how the addresses will appear on the envelopes.
Before placing your order, please verify that your return address and/or recipient addresses are correct. We cannot make changes to your addresses after you've submitted the order. Additionally, we are unable to reprint or provide extra envelopes if any addresses have been entered incorrectly.
For additional questions, please contact help@parabo.press.